Showing posts with label Dessert. Show all posts

Friday, October 28, 2016

Thandai Panna Cotta with Saffron Jelly

                      This is my favorite time of the year. The festivities start with the Indian festival of lights - Diwali. Thanksgiving follows next with festive food and crazy overnight shopping. And finally, the holiday season ends with Christmas and we welcome the new year with a bang. So its 2 months of awesome time with family and friends over food and fun.

                      With so much happening around this time, I am always looking for some quick to make dishes. As a big fan of fusion foods, I decided to marry two of my favorite cuisines to create a fun dessert. So here it is, the classic Italian dessert Panna Cotta with the Indian flavor of Thandai, served with Saffron flavored jelly.

                       Thandai is a classic Indian flavor. The paste is made with almonds, pistachio, fennel seeds, black pepper, saffron, cardamom etc. Being a vegetarian, I have used Agar Agar instead of Gelatin. Agar Agar flakes are widely available in grocery stores as well as online sites like Amazon.

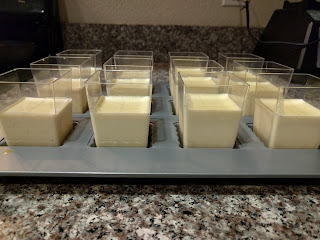
So here is my fusion dessert, Thandai Panna Cotta with Saffron Jelly.


Ingredients:

Panna Cotta:
  • 1 cup Heavy cream
  • 1/2 cup Half and half
  • 1 tsp Agar Agar powder
  • Sugar - I used about 4 Tbsp. Can adjust as desired
  • 2 Tbsp Thandai powder
Saffron Jelly:
  • 2 cups Water
  • 1 tsp Agar Agar powder
  • Sugar - I used about 2 Tbsp. Can adjust as desired
  • 3 tsp Rose water or 1 tsp rose essence
  • 7-8 Strands of Saffron
Instructions:

For the Panna Cotta:
  • Dissolve agar agar in 2 tbsp water and keep it aside
  • Mix cream, half & half, Thandai masala and sugar in a non stick pan.
  • Heat on medium-high heat and bring it to simmer. After that add the agar agar mixture and bring it to boil. Make sure to stir it continuously. 

  • Once it comes to boil, take it off the heat and strain it. 
  • Put in the serving glass and let it cool. Once it is room temperature, let it set in refrigerator for 2 hours or until set properly.
For the jelly:
  • Dissolve agar agar in 2 tbsp water and keep it aside 
  • Mix water, rose water, sugar and saffron in a pan.
  • Heat on medium-high heat and bring it to simmer. After that add the agar agar mixture and bring it to boil. Make sure to stir it continuously.
  • Once it comes to boil, take it off the heat.
  • Take the serving glass from the refrigerator and pour this jelly water carefully over the already-set Panna Cotta.
  • Let it cool until it reaches room temperature. Then keep it in the refrigerator to let it set for 3-4 hours or overnight.
Finally, Garnish with Pistachios and serve cold.


Saturday, February 14, 2015

Mocha Shortbread Cookies

                Happy Valentines day, everyone! As mentioned before, my husband is very fond of sweets and desserts. We are also big fans of coffee and love trying coffee from different places and all kinds of coffee beans and roast. So for this occasion, I thought to combine the top two favorites and made some chocolate coffee aka Mocha shortbread cookies. Hope you all enjoy and a sweet day!

Ingredients:
  • 2 cup All purpose flour (Maida)
  • 3/4 cup softened Butter (Can be replaced with Vegan Butter)
  • 1/2 cup confectioners or powdered Sugar
  • 1 tsp Vanilla extract
  • 1/2 cup mini Chocolate Chips
  • 2 Espresso shots or 2 tbsp Instant Coffee powder
Instructions:
  • Mix the melted butter and sugar in a large bowl. You can replace the powdered sugar with granulated sugar or brown sugar depending on one's preference.
  • Now add the Vanilla extract and beat at medium speed till it is creamy. If you don't have a beater, stir it thoroughly 
  • Now add the chocolate chips and coffee and stir it thoroughly.
  • Now add the flour slowly and continue mixing it on a low speed
  • Mix it till the mixture leaves the sides of the bowl and forms a smooth soft dough
  • Now divide the mixture in 3 parts, and flatten each part a bit.
  • Cover with a plastic wrap and refrigerate it for couple of hours
  • Meanwhile, preheat the oven at 350o F.
  • Now, roll out the dough a little more, and cut out the desired cookie shapes. I used the heart shape cutter for the occasion.
  • Arrange them on a cookie sheet and bake for 7-9 minutes or till they turn golden brown.
  • Remove from oven and then cool on the wire racks.
  • Once they are completely cooled, store them in an air-tight container. Enjoy!!

Thursday, April 10, 2014

Sooji (Semolina) Halva

          I am not a big fan of sweets, unlike my husband. I only like a couple of traditional Indian sweets and occasionally, I get a craving for them. Sooji or Semolina Halva is one of them. It is usually made during festivals or religious functions and I absolutely love it when my mom makes it.
        Today was one of those days when I was craving it. And despite having never made it before, I gave it a try. The end result was not as good as what my mom makes, but was decent enough for me. And for my husband, my food critic, he liked it.
       Halva is a sweet/dessert popular across Asia and Europe. There are various varieties of it differing slightly in the cooking method, though the basic ingredients are more or less similar with some variations. Here is my take on the Semolina Halva.

Ingredients:
  • 1 cup Semolina (Suji/Rava)
  • 2 cup Milk
  • 3/4 cup Sugar
  • 2 Tbsp Clarified Butter (Ghee)
  • 1 tsp Cardamom (Elaichi) powder
  • 1/4 cup Almond Slivers 
  • 7-8 Saffron threads
Instructions:
  •  Heat the clarified butter (Ghee) in a pan.
  • Add the semolina to it and roast till it is light brown/ Make sure you are cooking on medium heat. Cooking on high heat may burn it
  • Now add the sugar and saffron and mix it well.
  • Then slowly add the milk and stir it continuously, till the sugar melts and it attains a semi-liquid Halva like consistency. About 3-4 minutes
  • At this point add the cardamom powder. It is optional but I like the flavor
  • Mix it well and remove from heat.
  • Garnish with almond slivers and serve hot

Friday, February 14, 2014

Valentine Cake pops

                Happy valentines day, everyone! On that occasion, I was wondering what surprise to give to my husband. He is very fond of desserts, but I have already have made cakes, cookies, chocolate etc in the past. And so, this time I wanted to try something different. I started looking online for other options and I came across the idea of Cake-Pops.
               Its a form of cake styled as a lollipop. These pops are also a great idea to make something fun out of leftover cakes. You can be as creative with the cake pop decoration. Since I made it today as a valentine surprise for him, I kept it a simple decoration with red, pink and purple sprinkles, sugar and hearts. Also, since this was my first time making it, I wanted to keep it simple and not experiment a lot. So, here is how I made it.

Ingredients:
  • 1 Cake, baked and cooled (I made Chocolate Espresso Cake)
  • 1 cup whipped Frosting (I used vanilla)
  • 1 cup white Chocolate melts
  • Paper Lollipop sticks
  • Candy Sprinkles
  • Colored sugar
Instructions:
  • I made the chocolate-espresso cake from scratch. You can use any ready cake or even leftover cakes. Make sure the cake is completely cool.

  • Now take a cookie sheet or any big dish, line it with waxed paper and keep it aside.
  • Take a large bowl. Crumble the cake with your fingers and add to the bowl. 
  • Then add the frosting and mix well until the dough forms.
  • Now, roll it into firm balls or any desired shape using cookie cutters and place on the cookie sheet. Freeze them for about 15-20 minutes.
  • In the meantime, melt the white chocolate according to the package direction. You can either do it in microwave or using a double boiler on the stove.
  • If the mixture is too thick, add1/2 tsp of Oil in it and stir it well. The mixture should be smooth
  • Now take the cake balls from the freezer. I took 1-2 at a time. 
  • Take the lollipop stick, dip in the melted chocolate about 1/2 inch and then insert stick into the cake ball.
  • Then dip the balls in the chocolate melt until well coated. Tap on the bowl slightly to remove any excess chocolate. 
  • And then decorate with the desired sprinkles or colored sugars.
  • Let it set for half an hour at room temperature.
  • You can store the cake pops for about a week at room temperature or for about 2 weeks in refrigerator. But I am sure they wont last that long as they are very tempting.

Tuesday, July 23, 2013

Chocolate Shortbread Cookie

          Hi, I know its been a really long time since my last post, but it has been a real hectic couple of months. I promise to be more regular going further.

          Today I am back with a sweet treat for everyone - Chocolate Shortbread cookies. These cookies are a classic Scottish dessert and get their name from the crumbly texture.

Ingredients:
  • 2 cup All purpose flour (Maida)
  • 3/4 cup softened Butter
  • 1/2 cup packed Brown Sugar
  • 1 tsp Vanilla extract
  • 2 cup melted Chocolate
Instructions:
  • Mix the melted butter and sugar in a large bowl.
  • Now add the Vanilla extract and beat at medium speed till it is creamy. If you don't have a beater, stir it thoroughly
  • Now add the flour slowly and continue mixing it on a low speed
  • Mix it till the mixture leaves the sides of the bowl and forms a smooth soft dough
  • Now divide the mixture in 3 parts, and flatten each part a bit.
  • Cover with a plastic wrap and refrigerate it for couple of hours
  • Meanwhile, preheat the oven at 375o F.
  • Now, roll out the dough a little more, and cut out the desired cookie shapes. I made the circles
  • Arrange them on a cookie sheet and bake for 7-9 minutes or till they turn golden brown.
  • Remove from oven, let it stand for 10 minutes.
  • Dip the cookies in the melted chocolate and then cool on the wire racks.
  • Once they are completely cooled, store them in an air-tight container. Enjoy!!